The first time I attempted to bake bread, I learned quickly that it's not quite as simple as baking cookies, or cakes, or making a supper dish. It wouldn't rise! No matter what I seemed to do, or how long I waited for the action to start, it just didn't work. I tried, and I tried, and I tried again. I can't tell you how many cups of flour and jars of yeast were thrown out after each of my failed attempts. I gave up. I was not destined to be a bread maker.
And then one day I was working with my students, and I heard myself giving them some really good advice: if it doesn't come easy right away, you have to keep trying until you figure it out--it's a challenge--have fun with it! I sat back for a moment and thought about my latest failed attempt with yeast bread. And then I decided to listen to the words I often repeat to my students. I found myself determined to bake yeast bread. I got right on-line and found a recipe for a rustic country loaf from www.kingarthurflour.com. I read all of directions over and over again. I went to their tutorial pages and read about all the details that go into making bread. Finally, I felt ready to give it a try. To my great surprise and delight, it worked!
My first bread was OK. It wasn't anything really special, but I was so thrilled it may as well have been the best loaf of bread I'd ever eaten. But from then on, it got better and better. After awhile, I decided to try kneading the dough by hand rather than let my kitchen aid mixer do the work. I loved it. I loved the warm springy feeling of the dough and I loved the feel of the flour on my hands. The bread was even better with hand kneading. Next I began to experiment with different ratios of white-whole wheat-rye flours. I began to put more and more whole grain flours into the mix, but eventually I found that the bread began to get dry and overly dense if too much whole grain flour went into the dough. I was bummed.
One afternoon while I was kneading a batch of bread, I began to wonder what people did to make soft, chewy bread before white flour. It wasn't that long ago that people would have had no choice but to use whole grains in all their cooking. What did they do to make it palatable?
Around the same time Eliza had us over for dinner. She had just received a buying club order. I had ordered a big jar of lacto-fermented sauerkraut to go with the pork ribs in my freezer. She ordered the sauerkraut, but also bought a jar of lacto-fermented gingered carrots. They were totally amazing. I can't really explain them, but think crunchy, salty, gingery, carroty, and pickled. Simply delicious. But soooo expensive! I marched right home to find a recipe for those delicious pickles. I found one in a book called Nourishing Traditions by Sally Fallon. The crazy thing is that in the same book I found instructions for how to make 100% whole grain breads that are soft, light, chewy and delicious. Weird how the universe works, huh? I ordered the bread with some birthday money and waited not very patiently for the book to arrive in the mail.
When the book finally arrived, I raced home and began to devour.
Here's the key to making 100% whole grains soft, light and moist: soak them in a lacto-fermented liquid (yogurt, buttermilk, or diluted raw apple cider vinegar) for 12-24 hours before using. When I read this, I thought disgusting. Before trying to make a loaf of bread and failing miserably, I decided to start with something needing less flour. Since Jason loves waffles, we decided to start with that.
The night before making the first waffle batch, I put the wheat flour in a bowl and covered it with two cups of water and two tablespoons of apple cider vinegar. I mixed it up, covered it all up and left it to rest on the kitchen counter. The next morning I uncovered the mixture and added the rest of the ingredients. It was a weird consistency, not at all like the waffle batter I was used to. It was difficult to mix because it was kind of slimy, but it wasn't really thick. Just sticky....and slimy. I was very skeptical, but I plugged in the waffle iron anyways. When the iron was hot, I poured 1/3 cup of the batter into the iron and let it cook away.
To make a long story short, they turned out amazing. Jason even admitted that he preferred this recipe to the usual waffle batter. The waffles were light, crispy and very flavorful. With that experiment under my belt, I was ready to try a yeast bread recipe from the book. I started with a recipe that soaked the wheat in yogurt for 24 hours. The dough smelled kind of funny, but it was easy to knead, soft and it puffed up beautifully. The bread turned out to be moist and soft and easy to cut into thin sandwich slices. Very yummy. Lately I've messed with the recipe so that I soak the flour in the water/vinegar solution and I don't add the 1/4 c. of butter called for. This makes an equally delicious bread (in fact, I liked it better than the first loaf) and it's far less expensive to make.
Fermentation. Jason and I started exploring this wide world last summer when I was inspired by a friend to try to brew some ginger beer and Jason wanted to harden off some of our home-pressed cider. I never would have guessed that months later I'd be climbing deeper into this rabbit hole. What fun!
Jason just poured me a glass of his hard cider. We pressed the apples in the fall, and he carefully fermented the cider this fall and winter. At first the huge glass carboy sat in the corner of our living room burping and gurgling merrily away. After the action stopped, he moved the amber liquid into the spare bedroom closet where it continued its process. Now he's siphoned off the cider and packaged it into various reused jars. It's delicious and it makes me think of the fun we had in the fall, picking all those apples and pressing in the sunshine.
By the stove is a ginger bug bubbling away, ready to be turned into ginger beer. I started it two days ago with one cup of water, two teaspoons of sugar and two teaspoons of grated ginger. I mixed it all together, poured it into a quart sized mason jar, covered it with cheese cloth and waited. As the hours went by the invisible life all around us went to work. Now, just two days later, the bug is fizzing away, evidence of the wild yeast that found its way into the sweet solution. When I get off island on Tuesday I'll pick up a couple of lemons and a big piece of ginger. I'll mix the bug with more water, sugar, lemon juice and ginger, bottle it up, and put it away in a warm dark place for two weeks and wait while the yeast works its magic. After ten to fourteen days have gone by, we'll have delicious ginger beer!
Just tonight I began a batch of kombucha. It's just beginning to brew in the spare bedroom closet. This stuff is pretty funky. I began by brewing three quarts of black tea. When it was boiling hot I dissolved one cup of sugar. Then I took it off the heat and waited all day for it to cool down to room temperature. When it was finally cool I removed the tea bags, poured the tea into a gallon-size glass jar, and poured 1/2 cup of finished kombucha into the bottle. Finally, I added the mother. The mother is a round, flat mushroom that looks like a jelly fish and feels firm and slimy. I slipped it into the jar and it floated up to the top. I covered the jar with a cloth and put the whole concoction in the closet. Within a week, if everything goes well, the mother will have made a baby that can be used to make more kombucha. I look forward to tasting this fizzy fermented drink next week!
The next fermentation I'm very excited to try is those gingered carrots, but that will have to wait for the first carrot crop to come in this summer!

Sunday, April 18, 2010
Friday, April 2, 2010
Logging
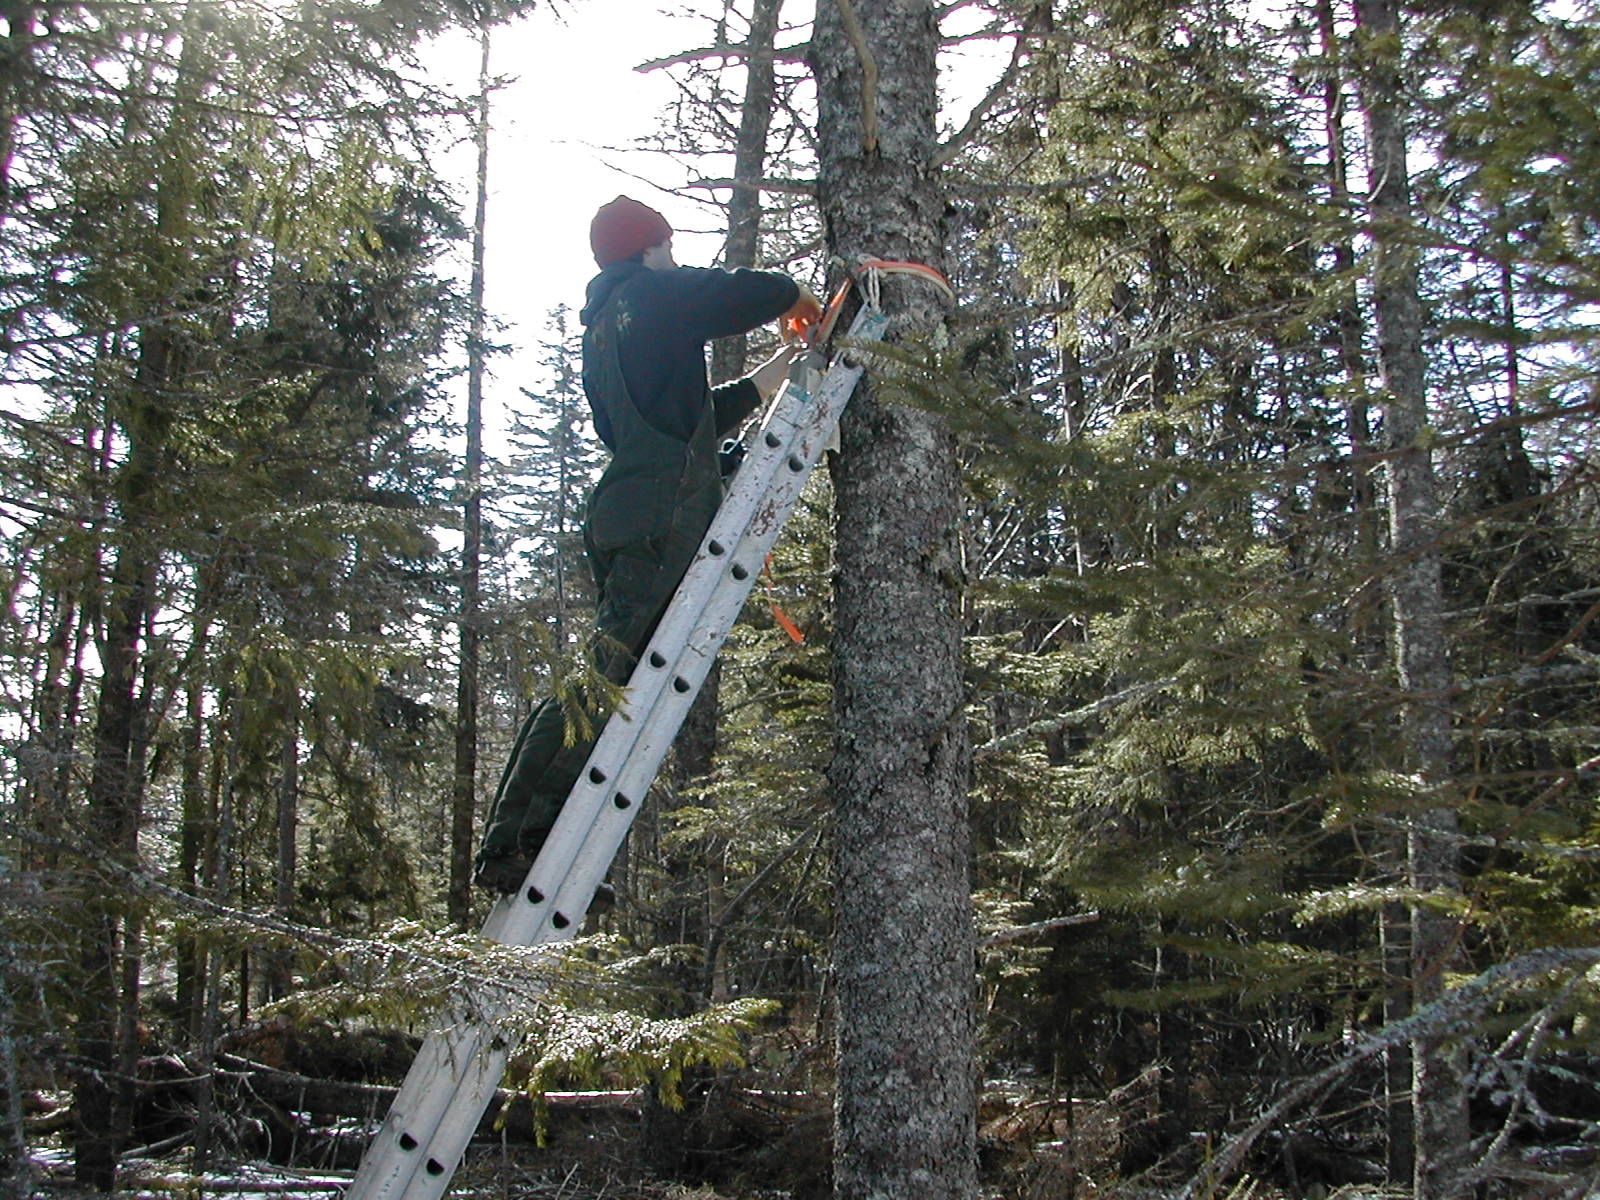
How do we get the wood?
First Jason goes in and trims up the fallen trees. He takes off the branches, and I drag them away to a pile for burning or chipping later. He then measures out the log and begins to cut the log into smaller pieces.
Next Jason sets up a block in a tree to help pull the log from the woods.
Then I operate the winch on the back of the tractor, and we begin to pull the log out of the woods. Jason wiggles the log back and forth to keep it from getting caught up on stumps, roots and other bumps along the way.
 When the log is out of the woods, we hook it up to the back of the tractor and haul it home to the sawmill!

First Jason goes in and trims up the fallen trees. He takes off the branches, and I drag them away to a pile for burning or chipping later. He then measures out the log and begins to cut the log into smaller pieces.

Next Jason sets up a block in a tree to help pull the log from the woods.
Then I operate the winch on the back of the tractor, and we begin to pull the log out of the woods. Jason wiggles the log back and forth to keep it from getting caught up on stumps, roots and other bumps along the way.

 When the log is out of the woods, we hook it up to the back of the tractor and haul it home to the sawmill!

Thursday, April 1, 2010
Cutting the Frame
Here's a model of our frame:
 All together, there are about 180 timbers that go into making this frame. So far we've cut 36 braces, 2 principle posts, 3 common posts, and 5 joists and purlins. Jason is working on laying out a connector right now.
Cutting one of these timbers is quite a process. After milling the lumber, Jason brings the wood over to the shop where he sets it up on sawhorses for cutting. Then, with the help of a timber plan, he begins to lay out each cut. He carefully measures and draws the cuts on the timber. He checks every measurement several times. Some timbers have five or six cuts, some timbers just have one or two. Depending on the complexity of the timber he's working on, this stage can take quite a long time.
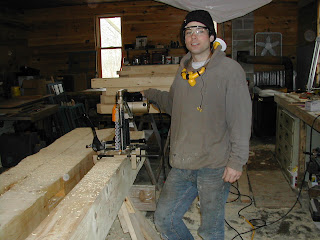 When he's done laying out the timber, he begins to cut. Some of the cuts he makes with saws and other power tools.
 The finer cuts he makes with chisels.
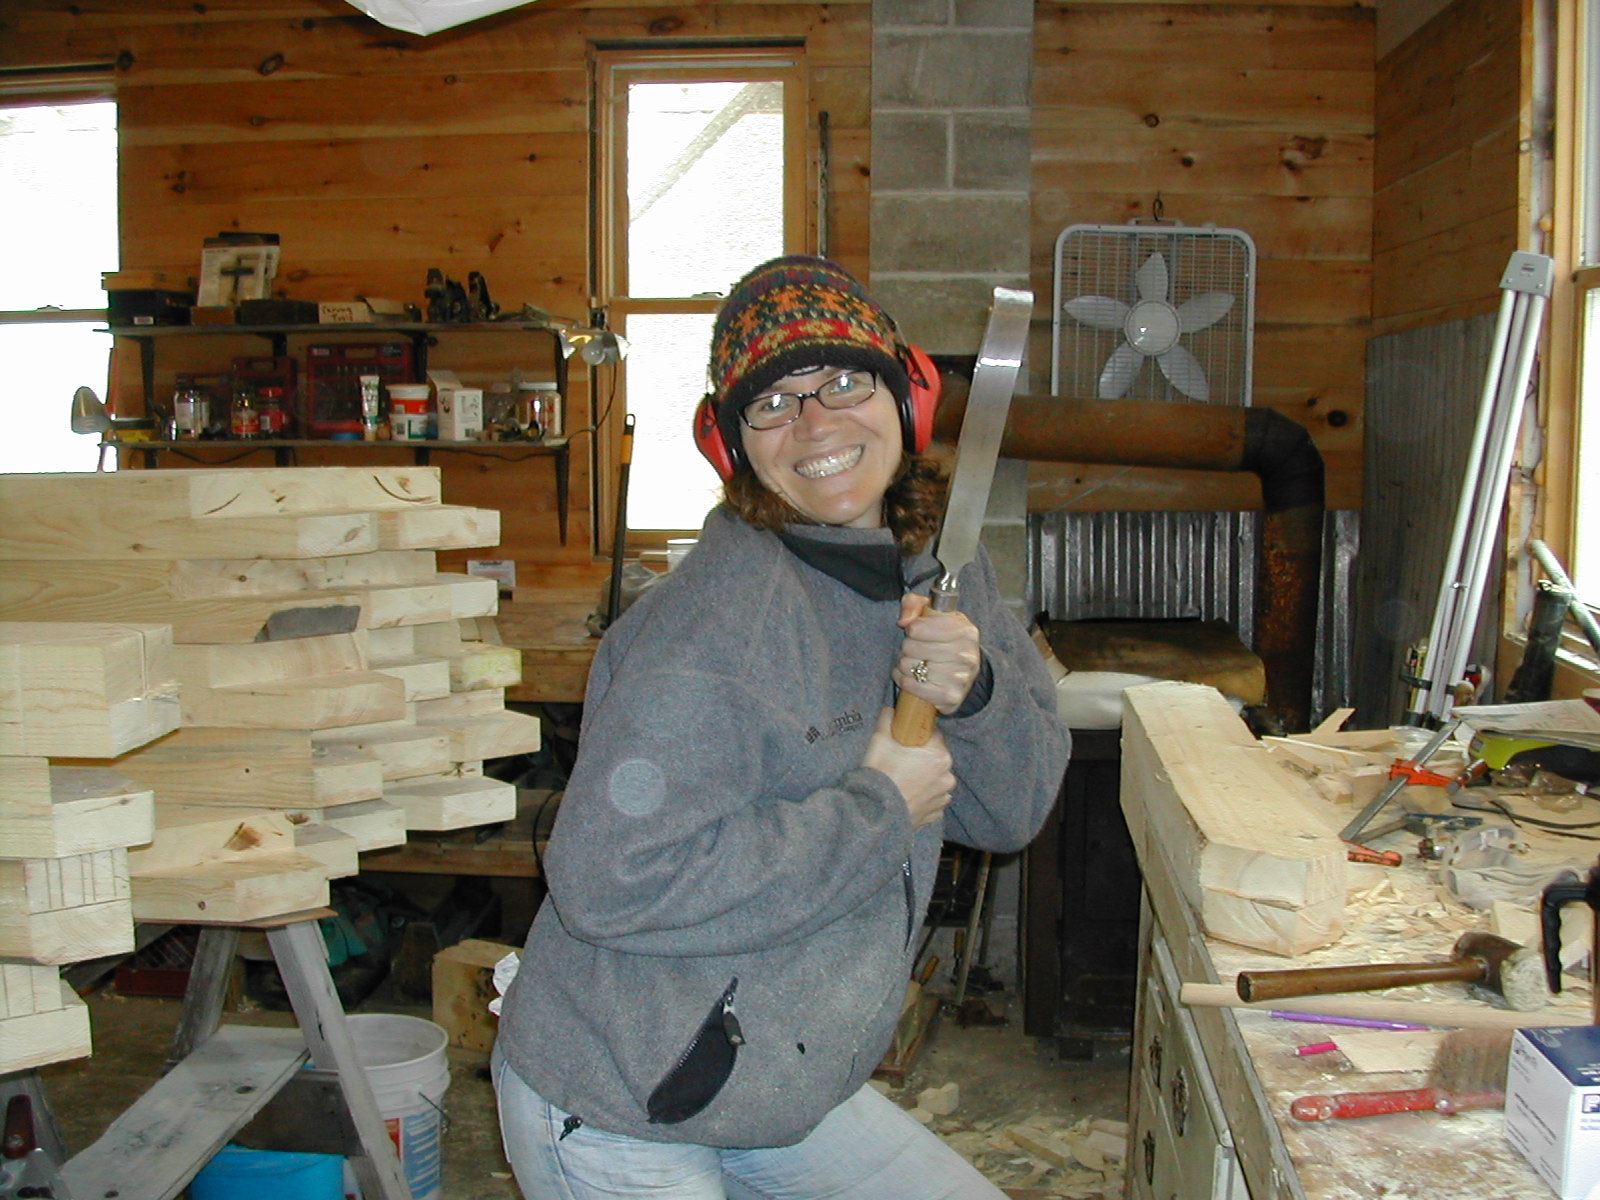
I have learned to chisel braces.
We only have a few braces left to cut! Yippee!!
Once the pieces are cut, we sand and oil them.
 When the oil is all soaked up, we stack the pieces outside, where they will wait until we're ready to put the frame up in August.

 All together, there are about 180 timbers that go into making this frame. So far we've cut 36 braces, 2 principle posts, 3 common posts, and 5 joists and purlins. Jason is working on laying out a connector right now.
Cutting one of these timbers is quite a process. After milling the lumber, Jason brings the wood over to the shop where he sets it up on sawhorses for cutting. Then, with the help of a timber plan, he begins to lay out each cut. He carefully measures and draws the cuts on the timber. He checks every measurement several times. Some timbers have five or six cuts, some timbers just have one or two. Depending on the complexity of the timber he's working on, this stage can take quite a long time.
 When he's done laying out the timber, he begins to cut. Some of the cuts he makes with saws and other power tools.
 The finer cuts he makes with chisels.
I have learned to chisel braces.

We only have a few braces left to cut! Yippee!!
Once the pieces are cut, we sand and oil them.
 When the oil is all soaked up, we stack the pieces outside, where they will wait until we're ready to put the frame up in August.
Subscribe to:
Posts (Atom)