Sunday, January 8, 2012

Happy New Year!

My Mom and Dad on New Year's Eve, 2011
Me and Jason on the last day of 2011!


The boys: Chris, Josh and Jason

All of us kids!  Happy New Year!!

Thursday, November 10, 2011

Knitting Flowers

I haven't always loved the look of granny square afghans.  Up until recently I thought they were down right ugly.  All those colors that don't seem to go with each other--Yuck!  But recently, within the last year really, my tastes began to change.  Over the past 12 months, I've been growing to love those granny square blankets with all their different colors sewn together.   In fact, I began to feel sad that I didn't know how to crochet granny squares!  

It was then that  I began to look for knit granny square patterns.  I searched through ravelry and found nothing that really excited me.  I did find some interesting ideas for knit hexagons and pentagons, but they all used one color.  I wanted to make colorful knit granny squares! 

A couple of weeks ago I began to search for knit flower patterns for a flower that I wanted to pin to my new hat.  I found one, and guess what?  After ironing the flower, I realized this knit flower was a two-color pentagon!  Did I get excited!  I headed straight to the yarn scrap basket and began to pull out some colors that I liked together, I cast-on and began knitting away!


Now I have six flowers done and one more on the needles.  My plan is to make 12 flowers and sew them together into a square to contribute to a group afghan the knitters in my community are making.  

The problem I ran into when trying to put these flowers together was how to make them fit together into something like a square. I thought this would be simple, but oh no!  It became a puzzle, and quite a fun one, too.  I put the six finished flowers on the table and moved them around.  At first I thought I would try to match the outside edges of the flower together like so: 

After messing around with the flowers for a few minutes, it was obvious they would not fit together in that configuration and make something like a square at the same time.  Plus the finished blob was way bigger than 12" x 12" which is the size requirement for the project I'm contributing to.

I twisted and turned the flowers some more until I realized that the petals need to fit inside each other to line up into a square-ish shape, like so:

I am so excited about this square.  Just three more flowers to knit!

Tuesday, November 8, 2011

Soaked-Grain, Whole Grain Bread

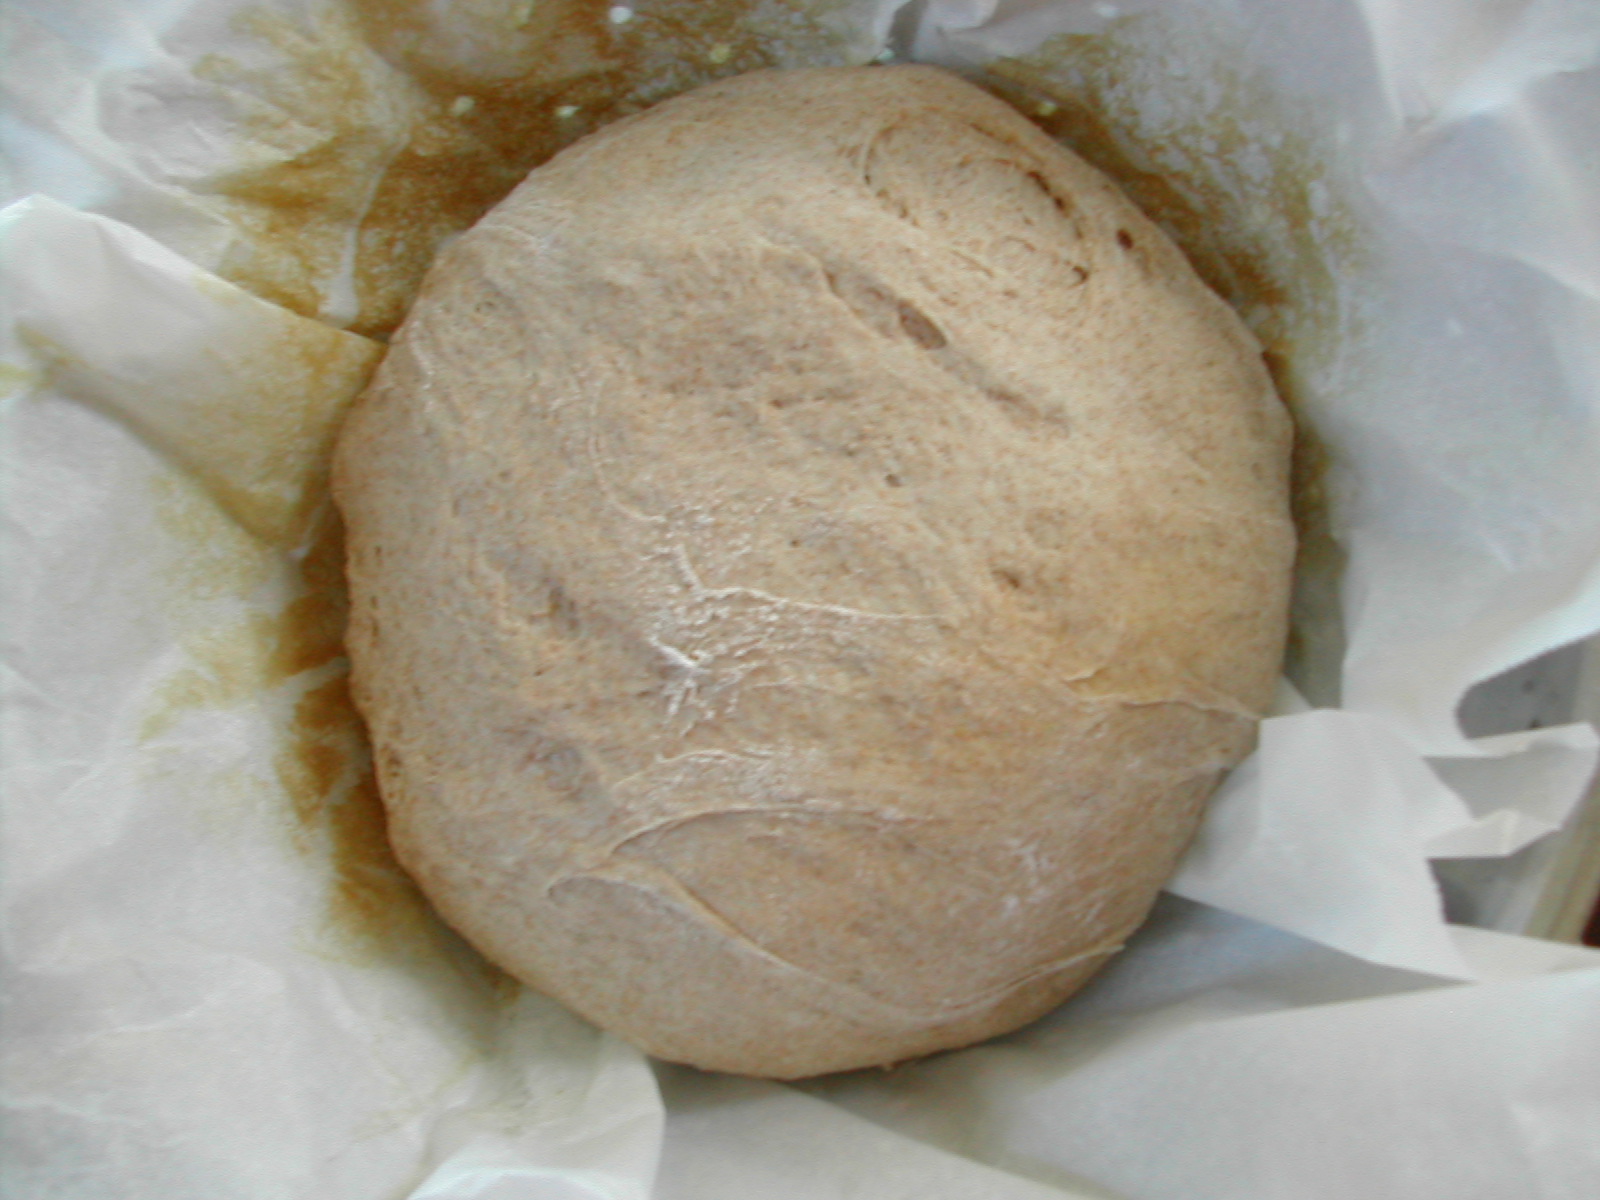
Bread-baking day is today!  The process began yesterday when I mixed the ground whole wheat and rye flour with a mixture of water and raw apple cider vinegar.  I know it sounds weird, but soaking the whole wheat flour before using it for baking makes the finished bread soft and chewy!


When I first began baking bread a few years ago, I was curious about how to make a whole grain bread that would still be soft and chewable.  In searching, I learned about soaking whole grains before baking them.  You can read about this discovery here

I adapted Sally Fallon's recipe for "Yeasted Buttermilk Bread."  Her recipe calls for soaking the grains in buttermilk.  Although I always have kefir around and fermenting, I don't really want to use it to make bread.  To lower the cost of the final product, I decided to soak the grains in a mixture of water and raw apple cider vinegar.

Soaked Grain Bread
Make one large loaf or two small loaves.

4 cups of whole grain flour (wheat, rye, spelt, kamut, or a blend)
2 Tbs. of raw apple cider vinegar mixed with 1 1/2 cups of water
1/4 cup of very warm water
2 1/4 tsp. of active dry yeast
2 Tbs. of honey
1 tsp. salt
1/2 tsp. baking soda
1 cup of unbleached white flour

Combine the whole grains and mix with the apple cider water mixture.  Cover with a plate or a towel and let soak for 12-24 hours.

Combine warm water, yeast and honey and let the yeast dissolve for about 5 minutes.  Add the salt and the baking soda.  Combine this mixture with the soaked grains.  Knead until a smooth ball forms, adding white flour as necessary.


Cover and let rise until doubled in size, for about two hours.  Punch down dough, stretch and fold and place in a colander lined with parchment paper.  Let rise until doubled, for about one to two hours.

Place a covered cast iron dutch oven in the oven and preheat the oven to 450 degrees (with the covered dutch oven heating, too). 


When the dough has doubled in size and the oven is preheated, carefully remove the dutch oven and the lid.  Carefully lift the dough from the colander and place inside the dutch oven.  Cover the pot and put into the oven.  Bake for 30-35 minutes.  Remove the lid for the last 5-10 minutes of baking to brown the top.  Cool on a rack. 


For more information about how and why to soak grains try these resources:

Saturday, November 5, 2011

Knitting for Winter

It is only the beginning of November, yet winter already made her first real appearance last weekend.  The national weather service issued a winter storm warning,  saying we were going to get hit by a Nor'easter and could even get accumulating snow!  "How did this happen so quickly?" I thought.  

The storm came and went.  We did get some snow--wet and sticky and it washed away with the cold rain that fell soon after.  The next morning I could see the snow topping the mountains across the bay.  Then this morning a film of ice covered the puddles in the road.   Thank goodness I started knitting my new mittens and hat last weekend!

The pattern for the hat and the mittens came from the book Felted Knits by Beverly Galeskas.

The mittens and hat nearly ready for felting.  Just the thumb to do on the left mitten!
The yarn is Wool of the Andes in blue yonder and springtime from Knit Picks.  Just one skein in each color is enough to make the hat and mittens set.

I felted them and added a cute little felted flower to the hat.  Now I'm ready for winter!

Saturday, October 29, 2011

Granola Bars

A few weeks ago, I looked up a recipe for homemade granola bars.  This is the one I chose.  The first time I made this, they turned out very good just as the recipe is written.

Of course when I went to make them again last night, I didn't have all of the ingredients, and since I live on an island and have no access to a grocery store without taking a boat first, I had to make some substitutions. Here's the recipe I came up with:

Ingredients
2 cups of rolled oats
1 cup of peanuts
1 cup of shredded coconut
1/2 cup of sesame seeds
3 Tbs. butter
1/2 cup of honey
1/4 cup of brown sugar
1 1/2 tsp. of vanilla
1/2 tsp of salt
1 cup of raisins
1/2 cup of dried cranberries

Directions
Toss the oats, coconut, peanuts and sesame seeds.  Spread evenly in a pan and bake @ 350 degrees for about 15 minutes or until it is toasted.  Reduce oven to 300 degrees.

Mix and bring to a boil the honey, brown sugar, salt, butter and vanilla.

Pour over and mix wit the oat mixture.  Add the dried fruit.

Press mixture into a 9"x13" pan lined with parchment paper.  Bake for 20-30 minutes.  Cool at least 2-3 hours.  Cut into squares.

All I can say is DELICIOUS!  They turned out kind of crunchy and chewy at the same time.   They're perfectly sweet and a little bit salty.  And the sesame!  Oh my goodness it's a great addition to the mix.  It was all I could do to not eat the entire bag this afternoon!

This batch turned out more crunchy than chewy and so didn't cut very well.  But the flavor was amazing!  I will make this one again.

Wednesday, October 12, 2011

Garden Disaster

If you ever wondered what would happen if you turned your back on your garden for two months in the summer, you don't need to anymore.  This is what will happen:

The weeds will grow up out of every possible bit of ground that isn't completely mulched.  Even if it is mulched, the weeds will bust through and grow, grow, grow.

The weeds will eventually smother everything, even the baby strawberry plants you tenderly cared for during the spring.  You won't even be able to distinguish the beds from the paths--the weeds will hide it all!   

After a summer of neglecting my garden in order to focus on our house, this is what I'm facing for my fall work.  I'm feeling so overwhelmed by it all!  Just thinking about the back-breaking work that went into creating these gardens over the last six years and the amount of back-breaking work it will take to get them back into shape for next spring makes me want to throw my hands up in the air and walk away.  But I know I can't do that.  Facing next spring, summer and fall without gardening would be even more depressing than looking at the weed-smothered garden of right now.

Here are the options I'm mulling over:
1.  Save the strawberries, let everything else go. 
2.  Save the strawberries, and plant garlic (which means wedding a section of the garden, prepping the garlic bed and planting).
3.  Save the strawberries and work bit by bit to rescue the garden, too.  That would mean finding the beds again, wedding them, prepping them with all the things that need to go into them for productivity, and then wedding and re-mulching the paths. 
4.  Do absolutely nothing with the garden until the house is done, we're moved in and I can focus on the garden again. 

I keep oscillating between all four options, but right now I'm thinking more and more about option 3.  I just don't know if I could face a spring without getting into the soil and planting!  Any suggestions?

Tuesday, October 11, 2011

Good Morning!

One of my favorite morning views.