Showing posts with label straw clay infill. Show all posts

Saturday, July 7, 2012

First Floor Stuffing Finished!

It is summer, and we are finally back to working on the house almost full time.  This week we finished stuffing the first floor with straw clay!  We didn't have that much left to do on the first floor, but it still feels great to have all of our walls closed in. 

This was the final kitchen wall.  Getting up into the tippy top was tricky and HOT!!

Now the kitchen has three walls! 

Jason also finished the stair treads going to the second floor.  Now we can run up and down the stairs between the basement and the second floor! 

My father came to visit for a week in the middle of June.  He worked on the plumbing for us.  Now that is all done, too! 


Thursday, September 22, 2011

Done...for now.

School began three weeks ago.  That means it is fall.  I can hardly believe it.  The hours we put into the house over the summer all blurred together into a continuous ache of muscles and a ubiquitous coating of clay dust.  It hardly feels like summer happened at all.  But here we are--the end of September.  The summer weather is trying to hang on.  The days are warm, the mosquitoes are torturing us each time we step foot outside.  It's the nights that give the change of seasons away.  They are cool, almost cold.  Last weekend I went as far as putting the extra blanket on the bed again.  And the garden give fall away.  The gardens are overflowing with produce just waiting to be harvested and put up for winter. 

So, somehow the summer slipped by.  And somehow we managed to miss it, but it obviously came and went because there's the house, mostly insulated, looking more like a house than ever. 
The north side of the house insulated.


The south side of the house all insulated.

The north wall of the house from inside and upstairs.

The south wall of the house from inside and upstairs.
Mostly insulated.  There are still a few small walls to do in the spring, but until spring it will wait.  Until then, we'll press cider, make apple sauce, harvest the abundance of food in the garden, continue to work on different aspects of the house (maybe windows!?  maybe siding!?).  Most of all, we will make time for each other, and that I can't wait for.

Monday, September 5, 2011

And now presenting..... The bedroom!

Arms aching from pounding straw and clay into wall cavities?  Check.
Skin and clothes covered in a fine dusting of clay?  Check.
Arms, face and hair greasy from four applications of mosquito repellent?  Check.
Bedroom walls totally finished?  Check!

Take a look for yourself!

Rick, Arthur, me and Mary stuffing the final bedroom wall.

Form moving up....

Even though he is a skeptic about our choice of insulation, Bentley showed up to help stuff.  (We checked his pockets for foam and fiberglass before he began).  :)

Moving up....


We are so close to the top!


Matt stuffing the tippy top.

A view from inside the finished bedroom. 

Inside the finished bedroom looking straight out towards the road.  How sweet is this room?!
A view from the road.

Monday, August 22, 2011

Since Wisconsin


Since returning from Wisconsin we have been working our guts out, and the house is taking shape.  In the two weeks since we have been home we finished the south wall, the east dining room window and two big walls in the kitchen. 

Living room picture window

Living room windows

Dining room and kitchen walls


Work Party #2!

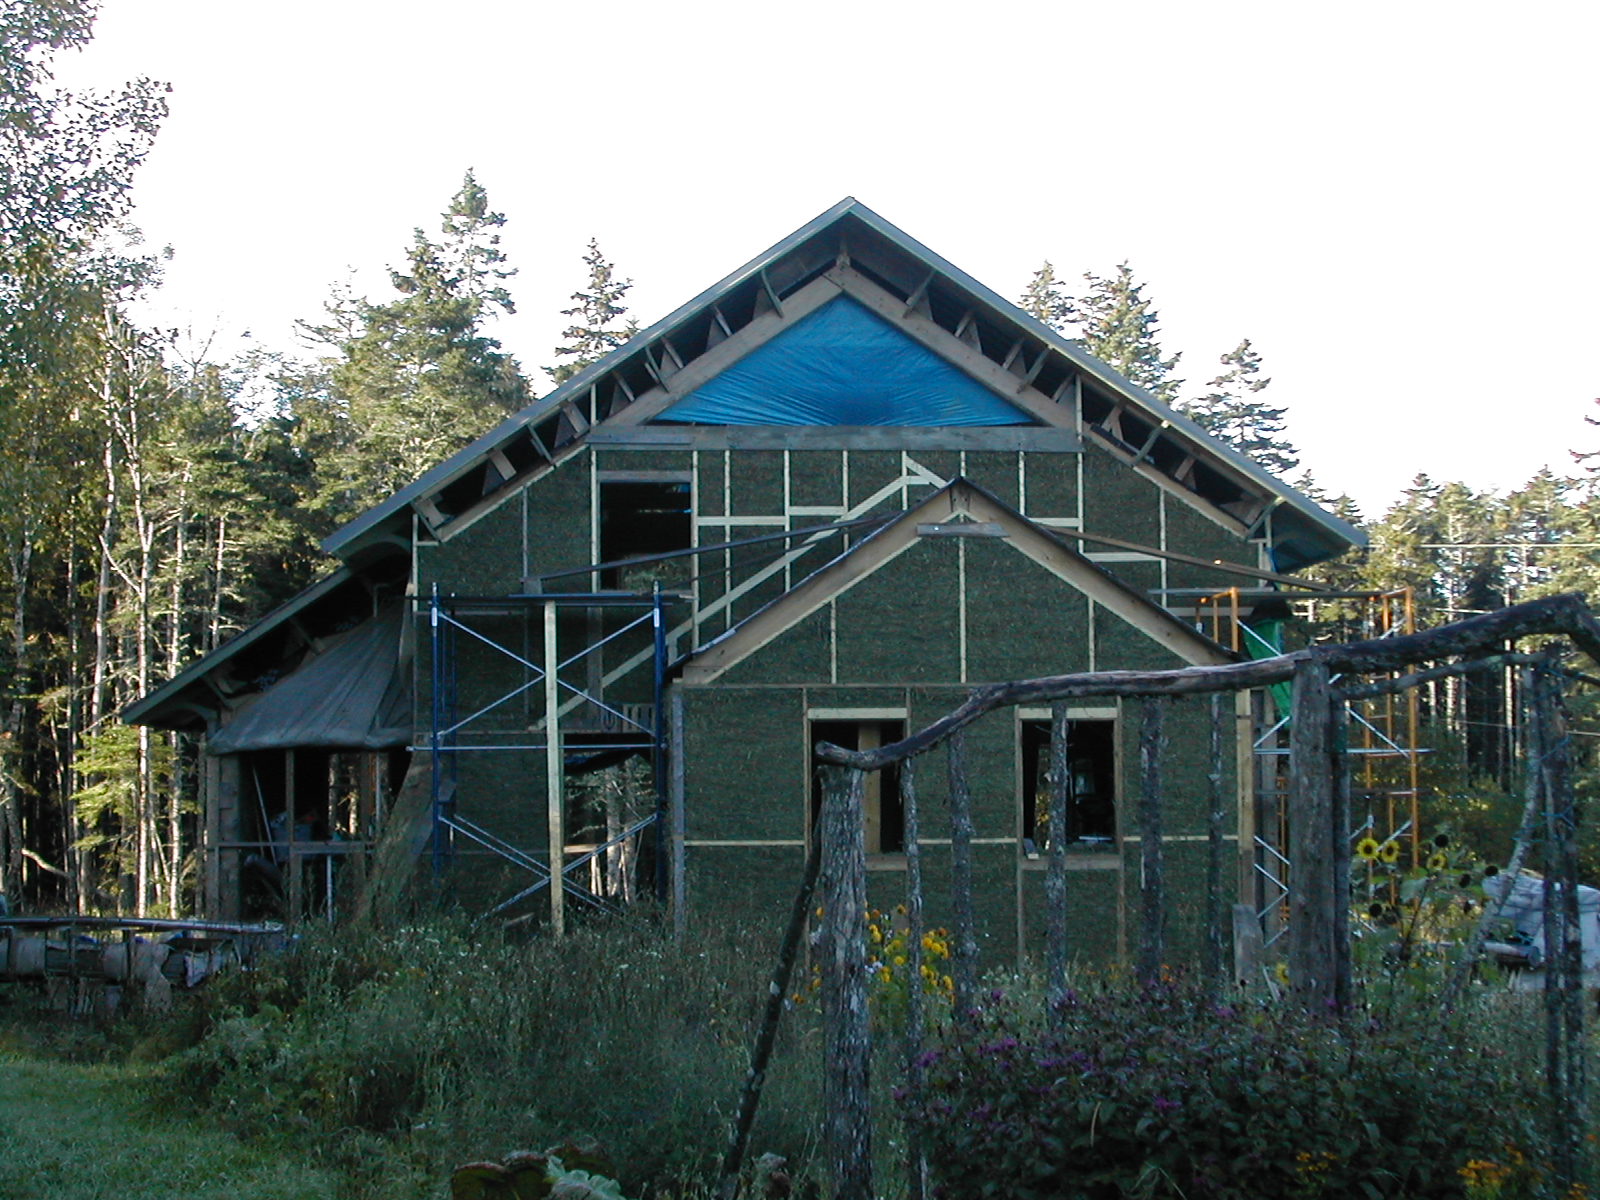
To celebrate Jason's 30th birthday on July 27, we had another work party!  Over 20 of our friends came over to help us infill the west side of our house.  Jeremy, Chris, Richard, Amanda, Ryan, Kate, Katrina, Ricky, Kaitlyn, Cory, Jim, Melissa, Xander, Beatrice, Ashley, Emily, Luke and more!  We worked our guts out, but had some fun, too.  By the end of the night, in the dark, we had a huge section of wall done!

The west wall filling up.

Mixing up straw and clay.

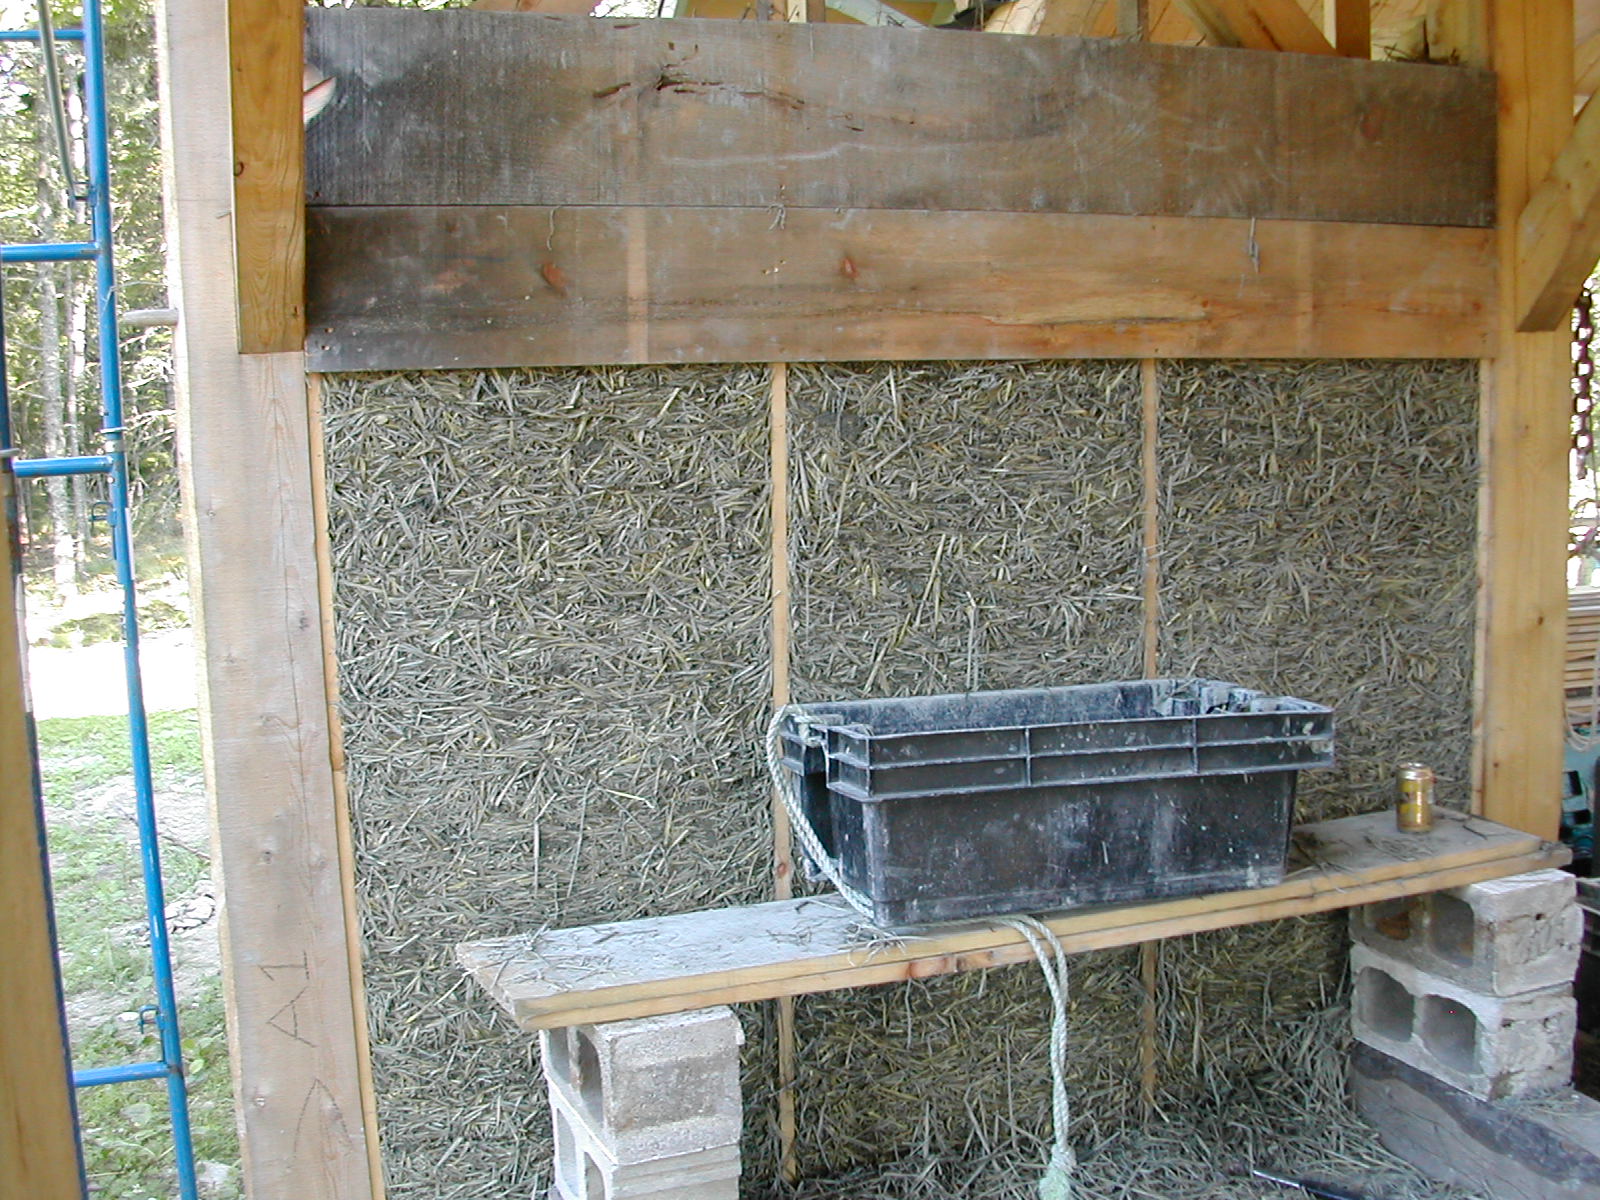
Working on the west  living room wall.

Helping to dry out the clay....


And then some food....  We deserved it after working all day!

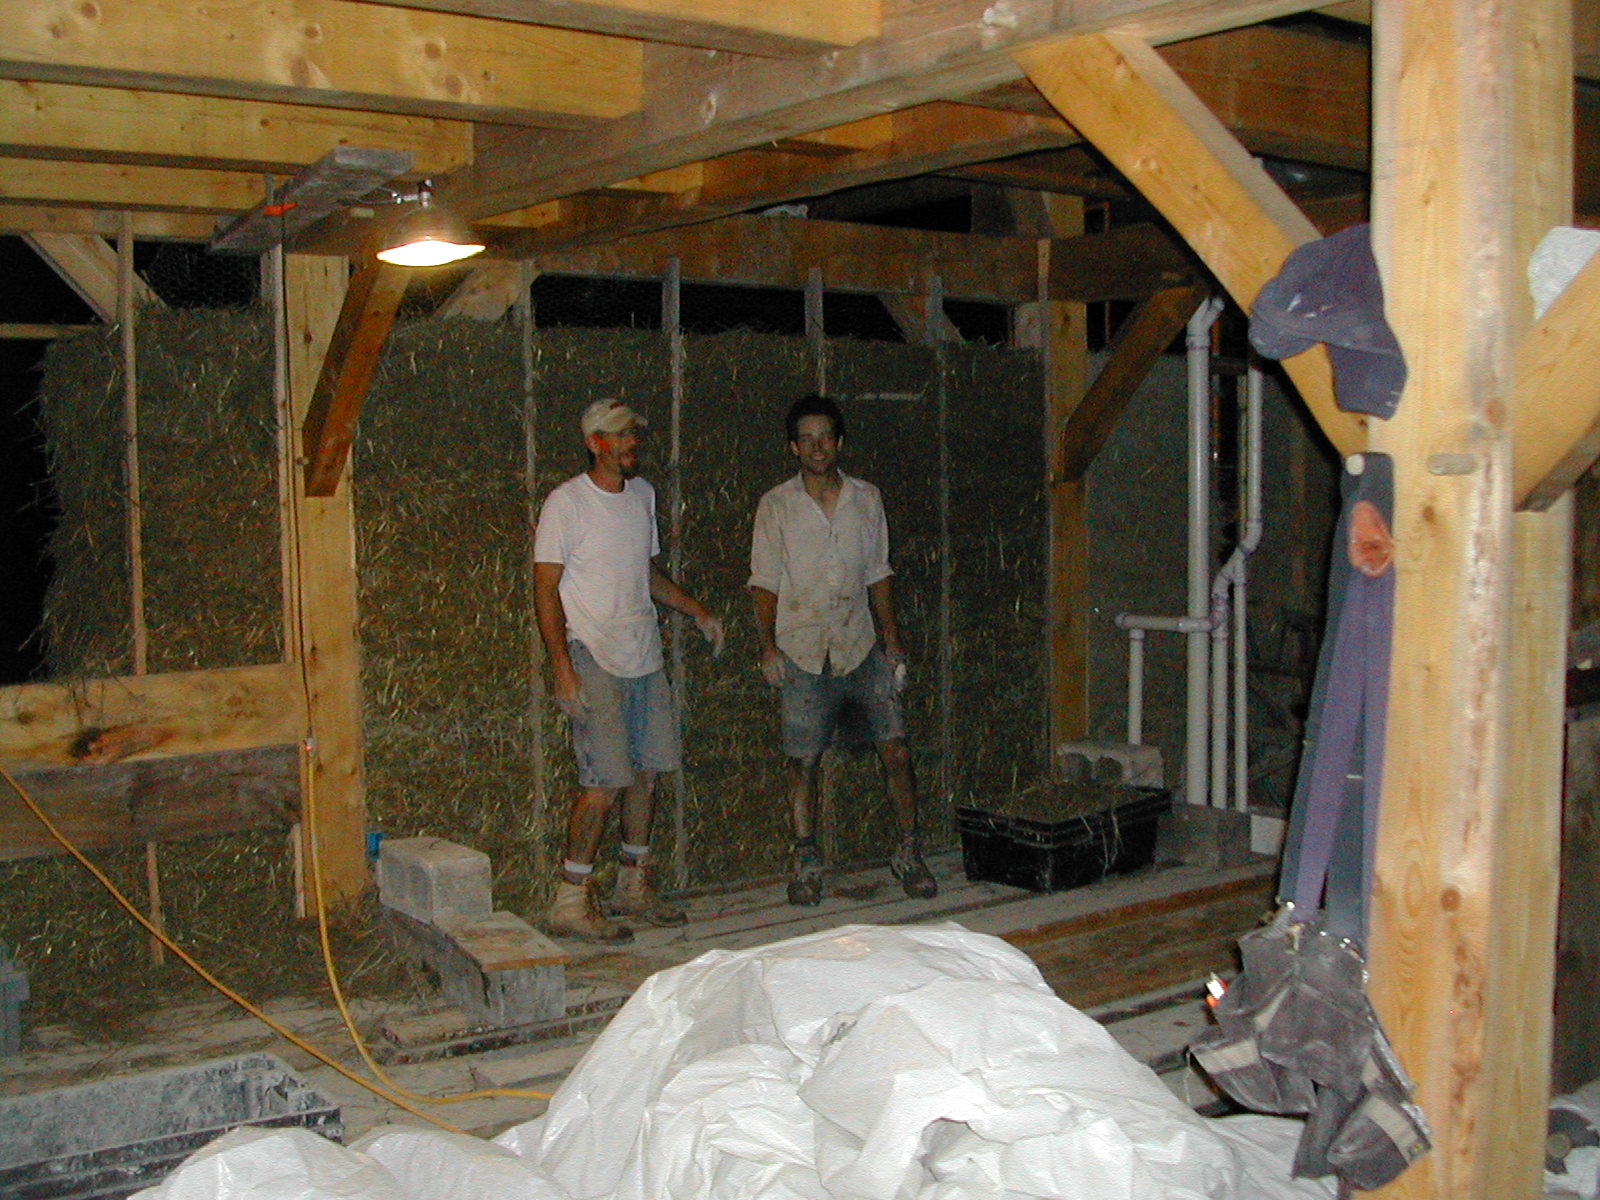
Finally, in the dark, around 8pm the wall was finished. 
Jason I returned to our apartment around 9:30 that night and the next morning we woke up at 4am and headed to Wisconsin for my mom's surprise birthday party!  We felt so good about getting so much work done on the house before leaving, and we couldn't have done all of that work without our friends' help.  Thank you!

Sunday, July 17, 2011

Straw-Clay Infill Work Party #1!

It has finally started!  Yesterday, with the help of our wonderful friends, we worked our guts out and infilled a wall and a half!  We can no longer see through the wall in our one-day entry way!  It looks great and I can just imagine how toasty warm it will be in the winter time.
Bill has helped us on almost every stage of this process.  He was there the day we poured the footing and now he is here mixing clay slip.  Thank you, Bill!  You have been such a huge help all along and especially these last few days. 

Here is 55 gallons of clay slip Bill and I made the day before the work party.  Bill rocks!

Brendan in front mixing clay slip and Mariah in the back tossing the clay and the straw.  These folks worked their guts out all day long!  Thank you so much!
This little guy supervised our progress throughout the day.  When he wasn't pretending the big bathtub on the side of the house was his boat, he was helping with whatever he could or talking our ears off.  He entertained himself all day long.  What a cutie! 

Finally, the infill!  Bill, Sonja and I are tamping the very first layers of straw-clay into the walls.
Moving right along, it's time to slide the form up! 
Mariah and Bill posing with the new wall.  We can't see outside anymore!

Katrina, very serious with her fork and clay mustache.  Thank you for coming by and tamping straw-clay with me, Katrina!
The inside of the wall with the forms still up. 
The outside of the wall.

Chris making more straw clay.  He tossed that mixture all day long and kept the pile of ready-to use infill high!  Thank you so much!

Adorable.
The inside of the wall without the forms.

The one-day bathroom wall up to the window.  Will we get this one done today?  Keep your fingers crossed!
I cannot say thank you enough to everyone who was able to help yesterday.  Bill, Sonja, Finn, Mariah, Chris, Matt, Brendan, Katrina and Kate--we couldn't have done it without you.  The amount of energy we put forth was impressive. Thank you, thank you, thank you!

Thursday, June 30, 2011

Clay Building

To avoid chemicals, but still get the benefits of a well-insulated house, we have decided to use straw-clay infill for our wall system.  We came to this decision after hours of research, and now that the frame is ready for insulation, we needed to learn about the technique and materials for straw-clay infill.  Last weekend we traveled to Brownfield, Maine to the Fox Maple School to learn about the beautiful practice of clay building.  Here's what we found out:

First things first--you need clay and lots of it! 

When the clay arrives from the quarry, we will first need to break it down into little chunks. 

When it looks like this, we will be ready to turn it into clay slip. 


To make clay slip,  we will add water to the clay and mix it for a really long time in a mortar mixer. 

Finished slip will be thick and pretty smooth.  When you pick it up the impressions of your hands will stay in the slip.  When you throw a clay chunk into the slip, a crater will form. 


When the slip is ready, we will prepare the straw.  The first step is to fluff up the straw, flake by flake, one flake at a time. 

Next we will pour some slip--a little more than a gallon per flake--onto each fluffed up flake of straw.


Now we will toss the flake of hay like a salad to coat each little piece of straw with the clay slip.  Now the straw needs to rest for a while--at least 8 hours--before using it to infill a wall cavity. 

After the straw has rested, we will begin to infill our walls.  To infill, we will fill in the wall cavities with about a foot of loosely packed straw.  Then we will compress it by about half, being careful not to compress it too much and leaving a little spring in the straw. 

In the end our walls will look like this.  The next step will be to let them dry and then apply an earth plaster to protect the straw-clay and for the finished wall. 

After infilling the walls with the straw-clay and allowing it to dry for several weeks, the next step will be to apply the earth plaster.  Earth plaster is a mix of sifted sand, sifted clay and chopped straw. 

First we will need to sift the sand....


Next we will need to sift the clay....


And chop the straw....

And then mix the three together:  three parts sand, one part clay and one part straw.

Next we will mix it all together, adding a bit of water as we go. 

In the end the plaster looks like this. 

And now it's time to plaster the walls inside and out!
Pretty neat, huh? 
The neatest thing about building this way, besides from the incredibly beautiful finished product, is the fact that at the end of the day, when we washed away the clay that had built up on our hands, arms, necks, and faces, we were actually cleaner than when we began!  How often does that happen in house building these days?!