To avoid chemicals, but still get the benefits of a well-insulated house, we have decided to use straw-clay infill for our wall system. We came to this decision after hours of research, and now that the frame is ready for insulation, we needed to learn about the technique and materials for straw-clay infill. Last weekend we traveled to Brownfield, Maine to the
Fox Maple School to learn about the beautiful practice of clay building. Here's what we found out:
First things first--you need clay and lots of it!
 |
| When the clay arrives from the quarry, we will first need to break it down into little chunks. |
 |
| When it looks like this, we will be ready to turn it into clay slip. |
 |
| To make clay slip, we will add water to the clay and mix it for a really long time in a mortar mixer. |
 |
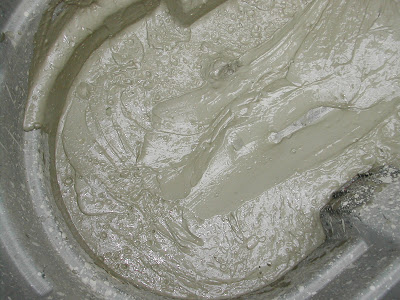
| Finished slip will be thick and pretty smooth. When you pick it up the impressions of your hands will stay in the slip. When you throw a clay chunk into the slip, a crater will form. |
 |
| When the slip is ready, we will prepare the straw. The first step is to fluff up the straw, flake by flake, one flake at a time. |
 |
| Next we will pour some slip--a little more than a gallon per flake--onto each fluffed up flake of straw. |
 |
| Now we will toss the flake of hay like a salad to coat each little piece of straw with the clay slip. Now the straw needs to rest for a while--at least 8 hours--before using it to infill a wall cavity. |
 |
| After the straw has rested, we will begin to infill our walls. To infill, we will fill in the wall cavities with about a foot of loosely packed straw. Then we will compress it by about half, being careful not to compress it too much and leaving a little spring in the straw. |
 |
| In the end our walls will look like this. The next step will be to let them dry and then apply an earth plaster to protect the straw-clay and for the finished wall. |
|
|
After infilling the walls with the straw-clay and allowing it to dry for several weeks, the next step will be to apply the earth plaster. Earth plaster is a mix of sifted sand, sifted clay and chopped straw.
 |
| First we will need to sift the sand.... |
 |
| Next we will need to sift the clay.... |
 |
| And chop the straw.... |
 |
| And then mix the three together: three parts sand, one part clay and one part straw. |
 |
| Next we will mix it all together, adding a bit of water as we go. |
 |
| In the end the plaster looks like this. |
 |
| And now it's time to plaster the walls inside and out! | | |
 |
| Pretty neat, huh? |
The neatest thing about building this way, besides from the incredibly beautiful finished product, is the fact that at the end of the day, when we washed away the clay that had built up on our hands, arms, necks, and faces, we were actually cleaner than when we began! How often does that happen in house building these days?!


No comments:
Post a Comment